Thursday, April 28, 2011

Fun With Color - Key Fobs

Ooohhh, maybe my next project should be a key fob wreath. Not practical, but definitely pretty. : -)

Key Fobs. Never really thought about them before. I never saw myself using one. Well, being a lover of all things crafty, I saw supplies to make some at Everything Ribbons on Etsy when I was getting suspender clips for the Pacifier Clips I made a few weeks ago, and decided to try making them. This is another very easy project, and they're SO practical! I've been using one for about 3 weeks now, and I'm wondering where it's been all my life. It frees up my hands, and that is helpful with 2 kiddos, and I'm not constantly searching for my keys anymore.


What You'll Need:

Heavy Weight 1.25" Cotton Webbing
Key Fob Hardware
Sewing Machine/Thread
Ribbon (or you could use fabric) - I used 5/8" ribbon
Something to make the ribbon stick to the webbing until you can sew it in place - I used Easy-Tack
Pliers to close the hardware - I strongly suggest getting these if you want to make a lot of fobs...the ends are already protected so you don't scratch the hardware....or you could try wrapping the ends with duct tape


Please ignore the mattress in the background. I sprayed the Easy-Tack out in my garage. : -)


First, decide which color webbing and ribbon you want to go together. Cut the webbing at a length of 10-10 1/2". I did a few at 11", and they were a little big for my hand/wrist, but those ones did fit my Fiance's hand just fine, so you can make them at 11" for a guy.

If you decide to use the Easy-Tack, make sure you're in a well-ventilated area. It's not a really strong smell, but you probably won't want to spray it in your house. Spray the back side of your ribbon, and then place it wrong side down onto your webbing and press into place. I let these set for at least 10 minutes.

Just sprayed the back/wrong side of the ribbon with Easy-Tack


I have horrible lighting in my garage...but you get the idea of placing the ribbon onto the webbing. : -)


Next, sew the ribbon in place. I thought the webbing might give me some problems since it is a little thick, but I didn't have any issues. I stitched down each side of the ribbon. Remember to back stitch on each end.


A stack of them with the ribbons stitched in place


Trim the ends so the webbing and ribbon are the same length.


I love the bright colors. : -)


To make it easier to keep the ends in place when adding the key fob hardware, I stitch the ends together. No need to worry about back stitching.

Stitch the ends to hold them together.


Ready to add the hardware. : -)


Side-view


Now to attach the hardware. Place the end of the webbing into the hardware and make sure they line up.

Hardware & Pliers


Placing the end of the webbing into the hardware and getting ready to close it.


Squeeze gently in the middle of the hardware. Even with the protection on the end of the pliers, if you squeeze too hard, you could still make marks on the hardware. Next, move the pliers towards one outside edge and squeeze again. Repeat on the other side, and then do it again in the middle. Make sure the little "grabbers" on the inside of the hardware have grabbed the webbing and that it is securely attached.


Squeezing the hardware to close it.


Squeezing closed one outside edge and then the other.


One more squeeze in the middle.... do you think that "squeeze" should be the word of the day?? : -)


Now all that is left to do is attach the key ring on the end, and you're done!


Attaching the key ring


Yay! All finished (okay, I have a few more to finish...)


These are easy to make and they make great gifts. My Mom saw the photos of the finished ones and gave me a subtle (not really, she said "I want THAT one") hint that she'd like to have one. : -)

NOW I'm all finished. : -)


The ones on the left and right were made with 11" webbing. I'm using the one on the left...a little big but I haven't bothered to switch to another one yet.


I hope you've enjoyed this tutorial as much as I've enjoyed sharing it with you.


~ Thanks for stopping by! ~

Jaime


Come join in the fun at These Fabulous Parties!

Wednesday, April 27, 2011

Sharing the Love... I've been featured!

I was pleasantly surprised to find out that my Button Tutorial was being featured by Heather at Decor-ganize Crafts today! I know I can be a little dorky at times, but I felt like doing a happy dance. There's a sense of satisfaction in knowing that others enjoy what you post.

Thank you Heather for making my day! By the way, her Cleaning Wipes Covers Tutorial is on my "to do really soon" list. I hope y'all will go check it out.

~ Thanks for stopping by! ~

Jaime

Wednesday, April 20, 2011

Buttons, Buttons, Buttons (Bookmarks & Magnets)

Howdy! I feel like I've been MIA for way too long. I planned on posting this tutorial over the weekend, and instead, the flu hit us, and decided to stick around for a few days. Blech. So glad it is finally gone! I hope all of you are doing well and staying healthy. :-)

Okay, now for some fun with a new obsession of mine. Fabric covered buttons. Soooo quick and easy to make, and you know I love quick and easy. :-)

That looks like a jumbled mess...


What You'll Need:

Buttons w/flat backs (I used size 36 and 45 in this tutorial)
Fabric
Book marker Paperclips w/glue pad
Scissors
Magnets
Glue Gun & Glue Sticks
Cover Button Assembly Tool (for each size you're using)

You can get the buttons, paperclips, assembly tool, and even the magnets at EverythingRibbons on Etsy. I LOVE this shop. :-)

Okay, first thing is to decide which fabric to use. I picked 5 or 6 different patterns and used up some scrap pieces I had. If you purchase your supplies from EverythingRibbons, you'll get instructions and a pattern to cut out your fabric. My lazy way of doing it is to just cut out a circle I know is large enough, and then trim it down.

I've chosen to cut a circle around the orange flower so it will show up on the button.


Another pattern I cut out, so it will show up on the button.


After you've cut out your circle (either using a pattern, or doing it my way), lay it right side down on the assembly tool (pictured to the left in the photo above). Take your button, and center it on the wrong side of your fabric, and use the small blue circle part of the assembly tool to push it down into the larger clear circle.


Cut out circle on top of assembly tool.


Button (also right side down) centered on the flower I want to show on the front of the button.


Button centered on another pattern.


Pushing down on the button with the smaller blue circle.


What it looks like when it's pushed down into the assembly tool.


Ooohhh, so pretty. : -)


Now it's time to trim the excess fabric. If you do it the "right" way and cut your circle out using a pattern, you can skip this step. I just trim around until it's almost (but not quite) flush with the bottom part of the assembly tool.


You want to make sure there is enough fabric left around the edge for the back of the button to "grab" onto.


Another view of a button with the fabric trimmed down and ready to add the back to it.


Now it's time to add the back to the button. I use the edge of the back to push the edges of the fabric down into the center before laying it down on the back (I think I'm confused with that explanation). Just try to not have any edges of the fabric sticking straight up. It makes it easier to push the backing in place. Make sure the curved up edge of the backing for the button is facing up.


Curved edge of backing facing up.


Laying the backing down, making sure none of the edges of the fabric are poking up or "escaping".


Now take the blue circle part of the assembly tool and use it to push down on the backing until you feel it pop into place.


You can use the blue circle this way or........


.....this way. I find it is easier to push down on the backing this way.


After the backing is in place, turn it over and pop out your fabric covered button!


Turning it over to remove the button.


Yay! So pretty. : -)


Love how this one turned out.


Okay, now to use the buttons you've made to make some magnets and bookmarks. I used the size 45s for the bookmarks and the 36s for the magnets. The 45s would work well for magnets, too.

Using your glue gun, put some glue on the glue pad of the bookmark paperclips, and press down on the center of the back of your button. Let set, and you're done! So easy.

For the magnets, add glue to the magnet, and press down on the back of your button. How quick and easy is that?? :-) I feel like this post is 10 times longer than it needs to be for something that is so easy to make, but for anyone that has read my previous posts, you know how much I love photos. I find it easier if I can see what is going on.....so here are a few more photos.


Button and bookmark paperclip with glue on the glue pad.


Woohoo! So easy, and adorable, and what a great gift for a book lover in your life. : -)


Glue on the magnet....

.....and you're done!


I can never have too many magnets on my fridge.


A few bookmarks.


What a great little gift. I put 6 magnets in the tin. Who doesn't love magnets? : -)


I hope you've enjoyed this tutorial and an overdose of photos. This is a great project to get the kids involved in as well.

~ Thanks for stopping by! ~

Jaime

Friday, April 15, 2011

What's For Supper? Lasagna & Garlic Bread

Mmmmmmmmmm


Okay, I have a confession to make. I'm not having this for dinner tonight. I made this Sunday night, and am just now getting around to posting it. I have good intentions, but the time doesn't always present itself so I can sit down and post it. :-)

I got this recipe from my Mom. I didn't create this delicious recipe. She's made it for as long as I can remember (which means at least 30 years....yikes!). This was always what I chose for my birthday supper, every year. My Mom got this recipe off of a lasagna noodle box, and I'm always looking for the same recipe when I go grocery shopping, but it seems to be forever gone from the side of the box (I think it was Prince brand...but I'm not for sure). Thank goodness she saved it. :-)

This recipe is a little time-consuming, but it's worth it. Not only for its yummy goodness, but this lasts us for 3 meals, so I don't have to cook supper for 2 nights! Happy dance! It also freezes well if you want to make a few of these. After putting it together and before cooking it, cover it up and put it in the freezer. Okay. Time for the fun part.

Ingredients:

1 (15 oz) container Ricotta Cheese
1 Egg, slightly beaten
1 cup grated Parmesan Cheese
Meat Sauce (recipe below)
16 oz. Lasagna Noodles, cooked
12 oz. shredded Mozzarella Cheese

Meat Sauce (ingredients highlighted in red):

In a 5 qt. (I use a 4 qt) kettle, heat 2 Tbsp. corn oil (I use olive oil) over medium heat. Add 1 pound ground beef, 1 cup chopped onion, 3 cloves garlic, minced and 1/2 cup chopped parsley.

Stirring frequently, cook about 10 minutes or until beef is browned. Add 2 cans (28 oz. each) crushed tomatoes to the beef mixture. Stir in 1 6oz. can tomato paste, 2 tsp. sugar, 2 tsp. dried basil leaves, 1 1/2 tsp salt, 1 tsp. dried oregano leaves and 1/4 tsp. pepper. Bring to a boil. Reduce heat and simmer, stirring occasionally for 45 minutes. Makes approx. 7 1/2 cups.


In a small bowl, stir together ricotta, egg and 3/4 cup of Parmesan cheese. In 13x9x2 inch roasting pan (make sure it doesn't have shallow sides), spread 1 1/2 cup meat sauce. Layer 1/3 of noodles (3), 2 cups sauce, 1/2 of ricotta mixture (I just drop small spoonfuls around to cover) and 1/3 of mozzarella cheese. Repeat once. Top with remaining noodles, sauce, mozzarella and Parmesan cheeses. Bake in 350 degree oven for 50 minutes, or until bubbly.

I always place a cookie sheet under the baking pan in case any of it bubbles over.


While that is baking, I take a loaf of french bread and slice it up. I mix some spreadable butter with minced garlic in a small bowl, and spread it on one side of the sliced bread. Put it on a cookie sheet, and after the lasagna is done, bake it at 425 degrees for approx. 7 minutes.


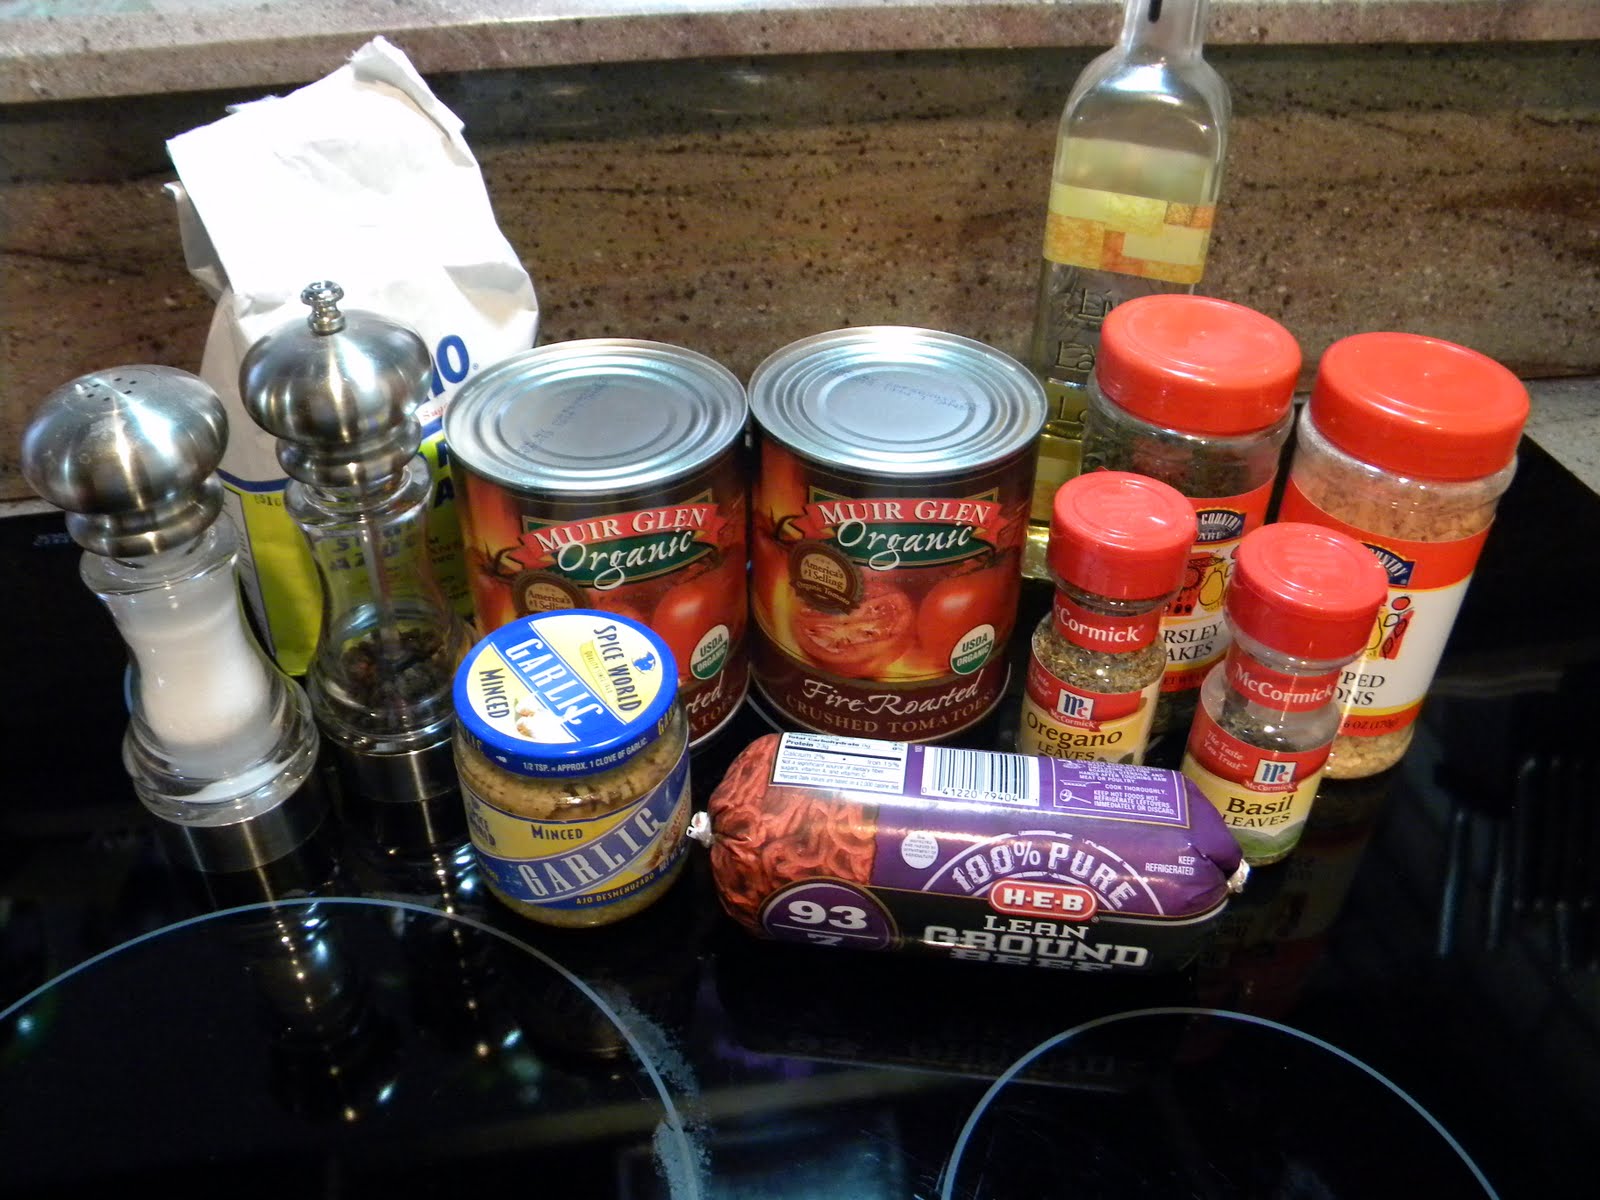
I noticed after I took this photo that the tomato paste was missing...pesky little bugger. ; -)
The Muir Glen Fire Roasted crushed tomatoes were on sale at HEB last week, so I decided to try that. Yummy.


There's the tomato paste! All the spices ready to be added to the ground beef/tomato mix.


All ingredients for the Meat Sauce added into the sauce pan and ready to be stirred.


Finished Meat Sauce. Yum.


The rest of the ingredients to put it all together. : -)


Ready to add half of the ricotta mixture to the layers.


Ready to go in the oven!


Bread, minced garlic and spreadable butter for some yummy garlic bread. : -)


Yummy. It's supper time. : -)


Enjoy!


I hope I don't drive you too crazy with all of my photos. I love lots of photos. I'm a visual learner. I kept all recipe separate at the top so if you want, you can just print that part and not have to print all these photos. :-)

Please let me know if you try this, and I hope you like it! (Okay, after reading that sentence back, all I can think of now is the Yo Gabba Gabba song, Try It, You'll Like It!)

~ Thanks for stopping by! ~

Jaime