Okay, now for the good stuff. Cabochons. I started seeing them everywhere....blogs, etsy....they seem to be quite popular. I, of course, just *had* to try and make them. I looked for a tutorial, and had no luck in finding one, soooooo, I decided to wing it, and this is what I came up with:
Materials needed:
Resin & Hardener - I used Easy Cast Clear Casting Epoxy (can be found here)
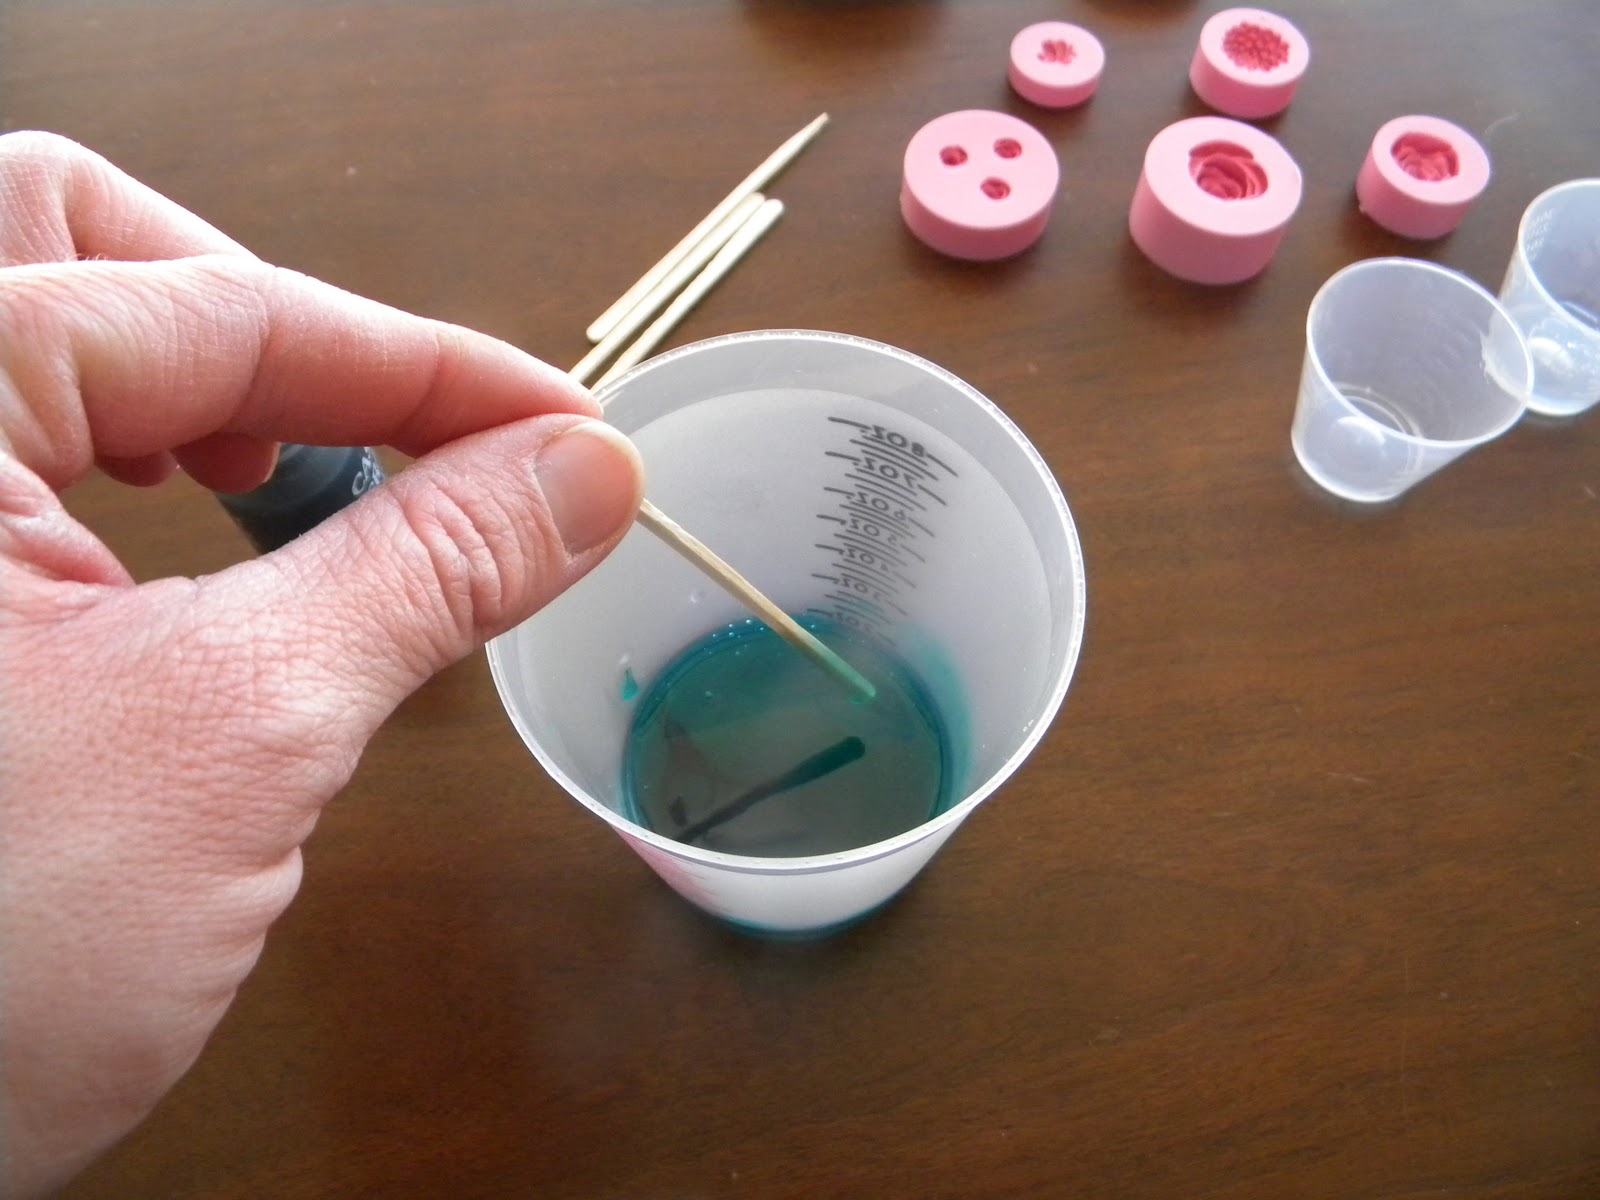
Mixing/Measuring Cups
Something to Stir with - I used small craft sticks...kind of look like toothpicks, but longer and wider on one end
Molds - I got mine on Etsy
Color Pigment - found here
Now that you have your materials gathered, let the fun begin! The Clear Casting Epoxy is an easy 1 to 1 ratio for mixing.
 |
| Easy Cast is a low odor resin, but it's still nice to have some fresh air while doing this, if the option is available. |


Once it is all mixed up (be sure and scrape the bottom to make sure it is blended well), pour it into your molds. Keep a piece of paper towel handy to wipe up any spills.

 |
| Use the small end of the stirrer to remove any air bubbles that form on the surface. |
Now you can step back and admire your handiwork. Use the paper towel to wipe out any excess resin mix from your cup so it can be re-used. Wait at least 12 hours to make sure it has time to set. I must admit, it is very exciting when you lightly touch it to check, and it's completely dry. Popping them out of the molds is so satisfying!


There is a lot you can do with your cabochons. So far I've made pendants and rings. The possibilities are numerous. Have fun with it!!


~ Thanks for stopping by! ~
Jaime
Come join in the fun at these fabulous parties!!
That is EXTREMELY awesome! I have always wondered how to make those. I found some molds similar to yours on etsy.. prolly from the same place I bet. And I wanted to buy them in hopes I would learn how to make some of my own cabochons! And then bam here you are with a lovely little tutorial! :) Thank you so much!
ReplyDeleteNew follower! :)
Yay! Thanks so much! I'm now following you as well, and I love the Easter Printables. I couldn't find a cabochon tutorial anywhere so decided to try it and see what happened. So glad this has helped! :-)
ReplyDeleteThanks for following me back! I think its so awesome you did this tutorial! I see that your blog is really new! And I hope I dont sound like a spammer or anything, lol, but if you would like some advertisement, I would love for you to check out my sponsor information! :) http://agapelovedesigns.blogspot.com/p/sponsor.html
ReplyDeleteI checked out your etsy shop, and would LOVE to advertise your blog and shop on my blog! :) Just email me if you happen to be interested!
~Maria-Isabel
Where do you find the ring bands that you put them on?
ReplyDeleteAnd all along I thought those little flower things were just buttons with the back cut off.. ha ha! Thanks for this!
ReplyDeleteall of these are gorgeous. thanks for sharing the idea! :)
ReplyDeleteYou're welcome, Ladies! :-)
ReplyDelete@Amye, I found the ring bands on Artfire. Just type in "filigree ring blanks" into the search bar under supplies, and you should find them. Good luck and have fun!
Super looking cabochons! Thanks for sharing!
ReplyDeletehttp://barbwired0117.blogspot.com/
Thanks for posting, What did you use to attach the flowers to the rings?
ReplyDelete@Amber, thanks & you're welcome! :-) I am now following your blog, and look forward to exploring it this weekend. :-)
ReplyDelete@Karla, I use Quick Hold Craft Glue to attach the cabochons to the rings. I've found it in Michael's and Hobby Lobby. :-)
Thank you so much for this tutorial! I've been wondering how to make these! MoldMuse on Etsy sent me your way!
ReplyDeleteWhat size rose mold did you use in the ring pictured?
ReplyDeleteThey are beautiful! Thanks!
-Sarah
Caleb-Paul-Hlebiczki.blogspot.com
I love Mold Muse! I get almost all of my molds there. :-)
ReplyDelete@Sarah, I used this mold, http://www.etsy.com/listing/62765111/rose-flower-flexible-mini-moldmould-21mm, for the pink rose ring, and I used this mold, http://www.etsy.com/listing/66334583/large-rose-flexible-mini-moldmould-1, for the blue rose ring. Hope this helps! :-)
These are super cute. Thanks for linking up!
ReplyDeleteSaw your link-up at Rhinestone Beagle. Whoah -- I had no idea you could actually make cabochons. I'm so excited! I can't wait to make some of my own. Woohoo!
ReplyDeleteJenn/Rook No. 17
I LOVE this....I mean I really love this. Another MUST try project. The color are gorgeous and i just adore cabochons! I am so a new follower!
ReplyDeleteHolly
504 Main
@Jenn, so glad you'll be able to make your own, now! It is addicting, once you start. :-) I'm a new follower of your Rook No. 17 blog and FB page, and having fun looking around!
ReplyDelete@Holly, thanks for following! Glad you're adding it to your "to-do" list! New follower of your blog and FB page. :-)
Thanks for posting this, I have always wondered how those were made. I love those rings!
ReplyDeleteGreat Job! Love these :) stopping by from Sew Much Ado link party
ReplyDeleteWOW! You did a great job! Awesome tutorial! I have really been wanting to make/buy some of them! Where did you get your ring bases? I love those!
ReplyDeleteA big THANK YOU for sharing this great tutorial, I ordered my first mold this morning from MoldMuse too!
ReplyDeleteFind your blog via Pinterest! I'm your newest follower :)
Veronica
Thanks SO SO much for this tutorial, I had been wondering for awhile now how to make these!! I'm so excited to give this a try :)
ReplyDeleteHow did you attach your bails? I am so tempted to begin molding and your tutorial is just the icing on the cake. Thank you so much.
ReplyDeleteemail: faye.goode@gmail.com
BaubleBinBeads at Etsy... brand new shop this week :>)
Thanks so much for stopping by! I attach my bails with a gel super glue. I find that regular super glue is just too messy for me. Good luck! :-)
ReplyDeleteThis tutorial is AMAZING! I love cabochon jewelry :)
ReplyDeleteThanks so much for linking up to DIY Diva Thursdays :) It would be awesome if you could link back to the party to help me spread the word :)
Kara
www.mineforthemaking.com
Hi Kara! So glad you like the tutorial. Love your idea for DIY Diva Thursdays! I'd already added your button to my "Let's Party" page, but forgot to add a link to that page at the bottom of this post. All fixed now. :-)
ReplyDeleteCan you use other paints as forms of pigment? What would happen if you used acrylic paints?
ReplyDeleteHi --Ladiessss---lolo--Check out my molds--
ReplyDeleteHand Sculpted by me--
www.cats-purrfect.com